Products
Knowledge & Support
Explore our Knowledge Hub:
Tips & Advice Education Area Case Studies The Grant House Virtual House FAQs Glossary Visit the Knowledge HubProducts
Knowledge & Support
Explore our Knowledge Hub:
Tips & Advice Education Area Case Studies The Grant House Virtual House FAQs Glossary Visit the Knowledge HubHow can I programme my heat pump using the Aerona³ Remote Heat Pump Controller?
If you have an Aerona³ air source heat pump installed with an Aerona Remote Heat Pump Controller, your heat pump installer should have programmed the heat pump as part of its installation and commissioning.
The Grant Aerona³ Remote Heat Pump Controller is a white cased wall-mounted unit that should be located in a convenient position within your home. It has dedicated levels and access for homeowners and installers/service engineers. As the homeowner, you should be familiar with the User Level but you should not adjust any of the settings sat within the parameters of either the User Level or the Installer or Service Levels - these should not be altered by anyone other than your installer, service engineer or a Grant Service Engineer if and when necessary.
Quick links for this Article…
In this article, we will explain:
- Functions of the Remote Controller
- The buttons on your Remote Controller
- Accessing the parameters of the User Level

Functions of the Remote Controller
The Aerona Remote Controller has three core functions which include:
- Enabling your installer to access and adjust your heat pump’s operating parameters as required (for example, when setting up your heat pump during installation or for servicing and maintenance)
- Providing you and your installer with a straightforward and easy means of switching your heat pump on and off if required
- Displaying error codes and warning icons if a fault is detected.
Homeowners should not edit the parameter settings for their heat pump - this should only be done by your installing engineer so if you have a question about the way your heat pump has been programmed, please contact your installer directly.
You should use your controller as a window for seeing how your heat pump is working. The User Level of the Aerona Remote Heat Pump Controller provides all the information that you may need on a regular basis, showing the heat pump operating information on the display screen. Symbols in the top right hand corner of the Controller’s screen will indicate the heat pump’s operating status including whether the frost protection is active, whether the defrost cycle is active, the heating demand, the hot water demand, whether the heat pump’s fans are running, the status of the circulating pump and the status of the heat pump compressor.
- Please read one of our other supporting blogs to learn what each of the symbols on your Remote Controller screen represent
- In addition, you can watch our video here to learn about the heat pump operating modes that display on the Aerona Remote Controller.
Via the User Level, you or your installer can also switch your heat pump on or off when required.
The buttons on your Remote Controller
Your Aerona Remote Controller will have a white cased cover which when opened will reveal the Controller’s display screen and main buttons.
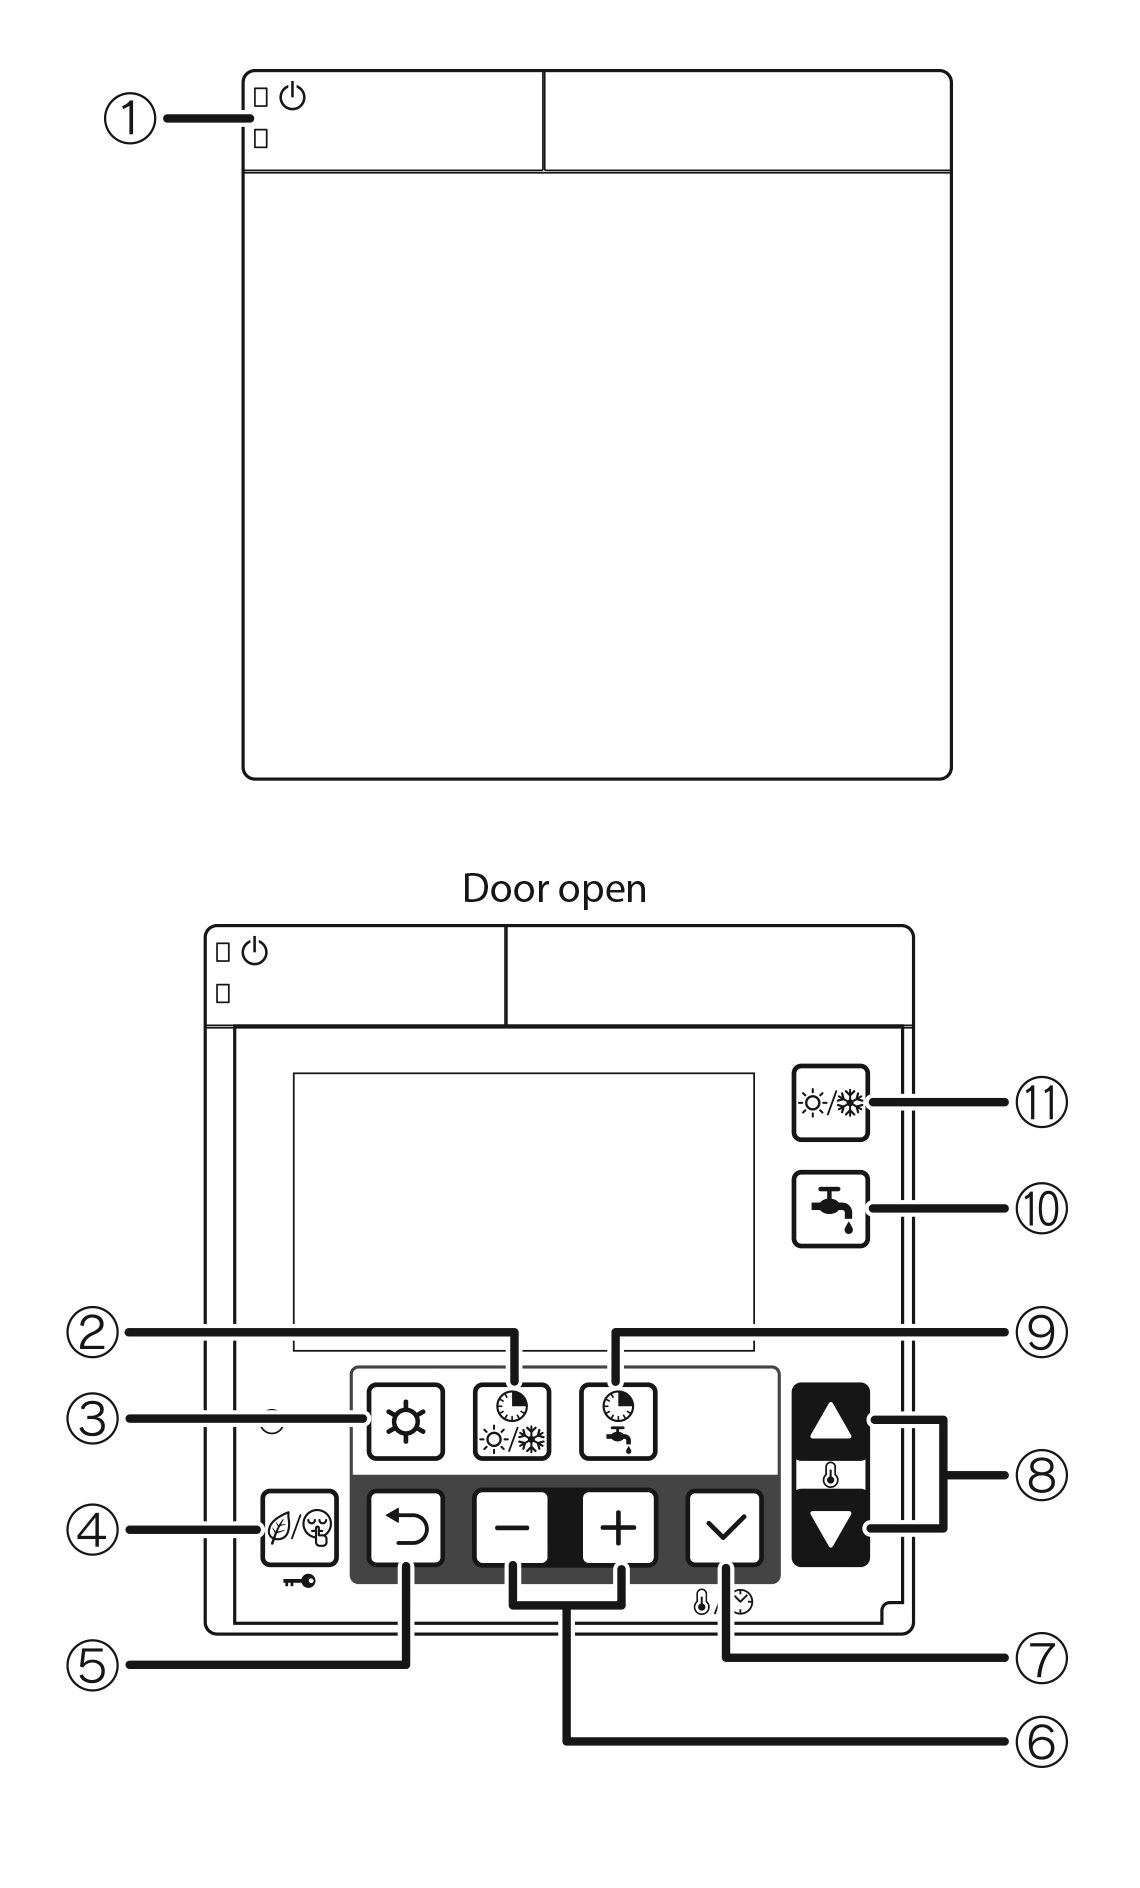

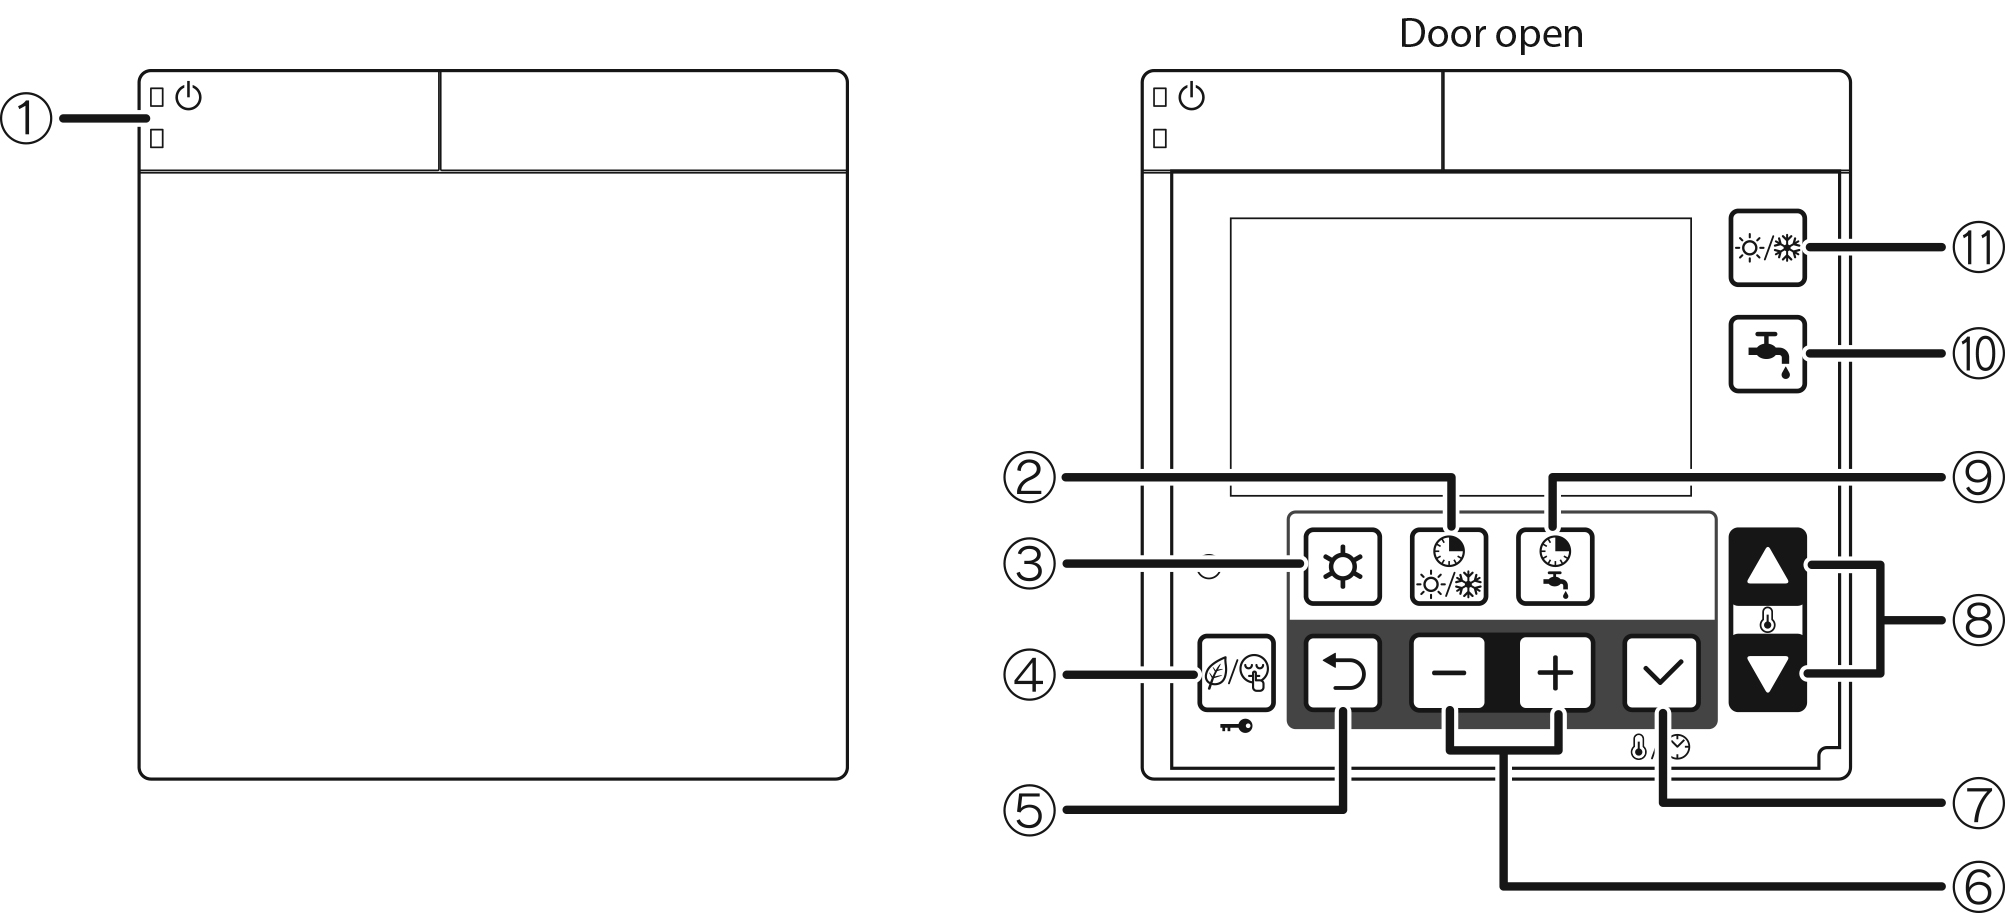 The main buttons you and your heating engineer will need to use are:
1 – ON/OFF button
3 – Menu button (used to access parameters)
4 – Night mode/Low Tariff button
5 – Return button
6 - +/- buttons (used for parameter settings)
7 – Set/Confirm button
8 – Up/Down buttons
9 – Timer low tariff/night mode button
Accessing the parameters of the User Level
To conclude, should the parameters of the User Level of your Aerona Remote Controller need to be adjusted, this should be done by your heating engineer. Our video below demonstrates the steps that your engineer should follow to access these parameter settings – your engineer should also refer to the Installation Manual.
Additional support and resources
- Learn more about ‘How to Control Your Heat Pump’ in our Home Heating Blog
- Contact your installing engineer if you have questions about the set-up and parameters of your heat pump's settings.
Was this article useful?
Have more questions? Submit a request
Are you a professional? View our Professional Support Centre
Couldn't find what you were looking for?
Alternatively you can speak to a member of our team - Subject to Operating Times